The definitive guide on how to setup WooCommerce + Facebook + Instagram shop

Running a shop on Facebook or Instagram and linking it with your WooCommerce store should be an easy task. And it is — in theory. You install the Facebook for WooCommerce extension, link it to your Facebook Business account, and presto! You have your shop ready to reach new customers!
Well, at least that’s how it’s supposed to work. But sometimes, there are… kinks… Don’t worry, though. We’ve ironed a bunch of them out for you. In fact, we’ve gone deep into the Facebook and Instagram shop Business, and we managed to get all the layers of configuration sorted out.
And how much do we love you? Enough to give you the steps to configure this integration for yourself. You’re welcome.
1. First steps
1.1. Facebook Business setup
- Create a Facebook page.
- Create a Facebook Ad account.
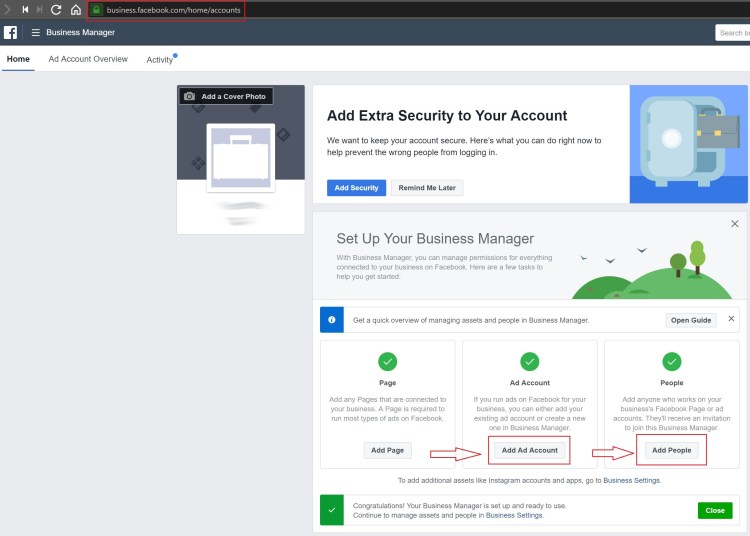
- Create a Facebook Business Manager account:
- After setting up Facebook Business Manager account, on the page that will open:
- Click Add Ad Account and follow instructions on the screen.
- Click Add People and add administrators for the account.
1.2. Selling on Instagram?
- Create a new Instagram account for your business, or convert your personal account to a business account. But first things first! You will have to set up your Facebook Business account before you set up your Instagram store. Whatever you do, don’t forget that step.
2. WooCommerce integration
2.1. Setting up Facebook for WooCommerce extension
- Install the Facebook for WooCommerce extension.
- Follow the plugin’s documentation instructions to configure it.
- After set up, go to the plugin’s configuration page and click the Sync Products button.
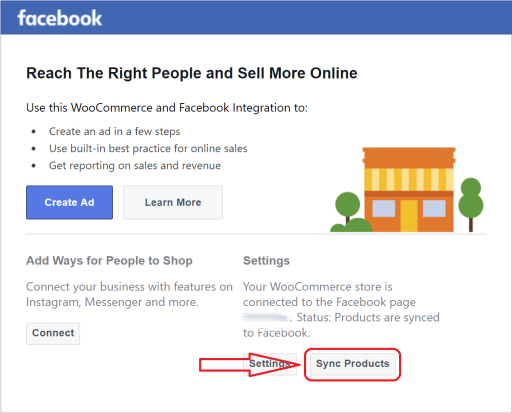
- After syncing, products can take up to 24 hours to show up in the Facebook shop catalog.
- The plugin will create a catalog automatically.
- You can check in the Facebook Catalog Manager if all products were synced correctly, selecting the catalog created by the plugin (usually <something> – WooCommerce).
2.2. Linking your Instagram Business account
- Go to the Facebook Business Settings page.
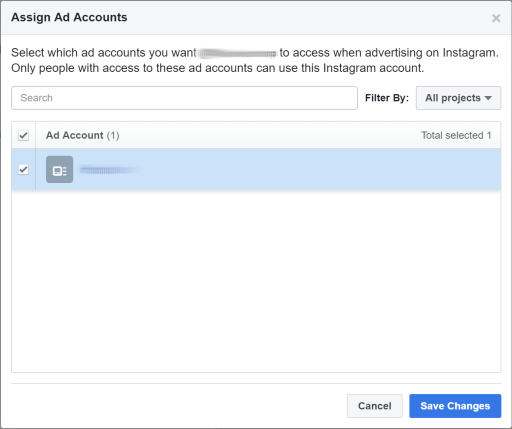
- Go to Accounts > Instagram Accounts and add an Instagram account, linking it to your Instagram Business account.
- After linking, click Assign Ad Accounts and add your Ad Account.
- Click the catalog in Facebook Catalog Manager.
- Go to Settings tab and click Connect on the Business Manager Account section.

- Connect to your account, if it’s not connected yet.
2.3. Page admins setup
Configuring admins is a mandatory step if you want to give someone else (like a hired agency or developer) access to your Business page, granting them the permissions to properly configure the Facebook for WooCommerce extension in your behalf.
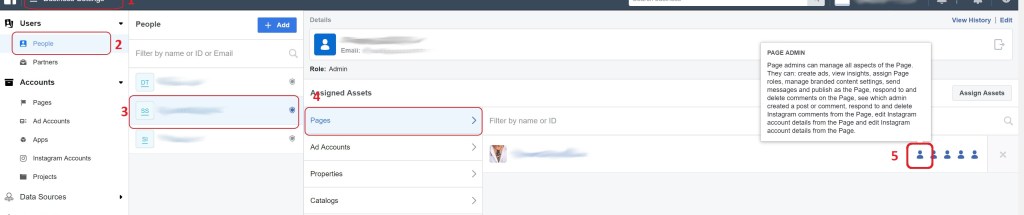
- Go to Business Settings page (1) and head to (2) Users > People.
- Click + Add to add users you want to give administrative rights to your page.
- After adding them, click the (3) user name in the list, then (4) Pages, and make sure your page is selected.
- Mark the user as (5) Page Admin, following the instructions below (believe me, it won’t work if you’re not a page admin. You can check the whole drama in Facebook’s GitHub page):
- When you hover your mouse over the page name, these silhouette images will appear. You need to click in the first one of them to set the user as Page Admin (the current user’s role is probably Page Advertiser).
3. Tagging products on Instagram
3.1. Enable Product Tagging
- Using the Instagram app, go to your Profile.
- Select the Get Started alert or the gear icon.
- Go to: Shopping > Continue.
- Select a catalog to connect to your Business profile.
- Done.
3.2. Tagging products on your Instagram posts
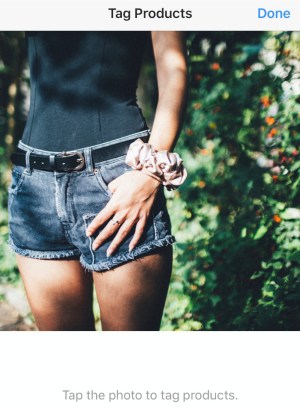
- Using the Instagram app, select a photo and add a caption, filter or hashtag, as usual.
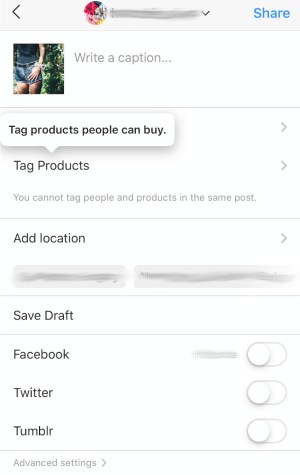
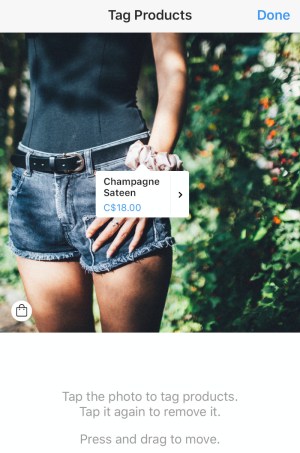
- Tap in the picture where the product you wish to tag is.
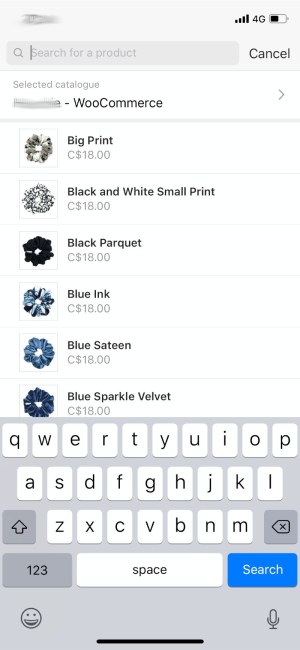
- Enter the name of the product to tag and select it in the Search box.
- Done.
- Share.
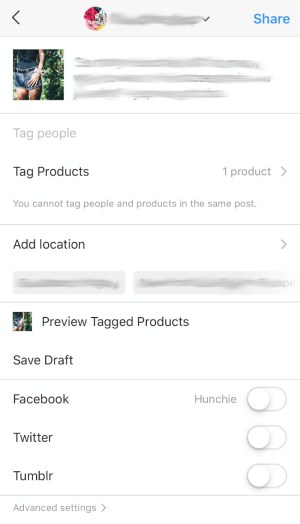
You can tag up to five (5) products in a single Instagram post, or 20 products in a multi-image post.
You can read more at the official Instagram documentation: Tagging Products on Instagram Posts.
Notes and warnings
- Facebook will pull description for products in the shop this way:
- It’ll look into WooCommerce and get the product’s Long Description first. If it’s filled, it’ll use it.
- If not filled, it’ll pull from Short Description.
- Facebook and Instagram shops deal with products in different ways.
- When clicking a product in Facebook, it opens a tab right to the WooCommerce cart page, with product added to the cart.
- Instagram, on the other hand, opens the product page inside your WooCommerce store.
- Both Facebook and Instagram will dismember variable products. That means that if you have a product with 10 variations (like a shirt with different colors and sizes), it’ll be displayed as 10 different products on Facebook and Instagram shop. The title for the 10 products is the same. You’ll be able to see which is which by the description of the product.
There, we’ve put in countless hours working all of this through so you don’t have to! What else is keeping you up at night? Let us know and we might just try and tackle that for you too!