Creating a Winning User Experience with WooCommerce Checkout
Have you ever wondered why so many customers leave your online store just before making a purchase? It’s a frustrating reality for many eCommerce businesses, but the solution might be simpler than you think.
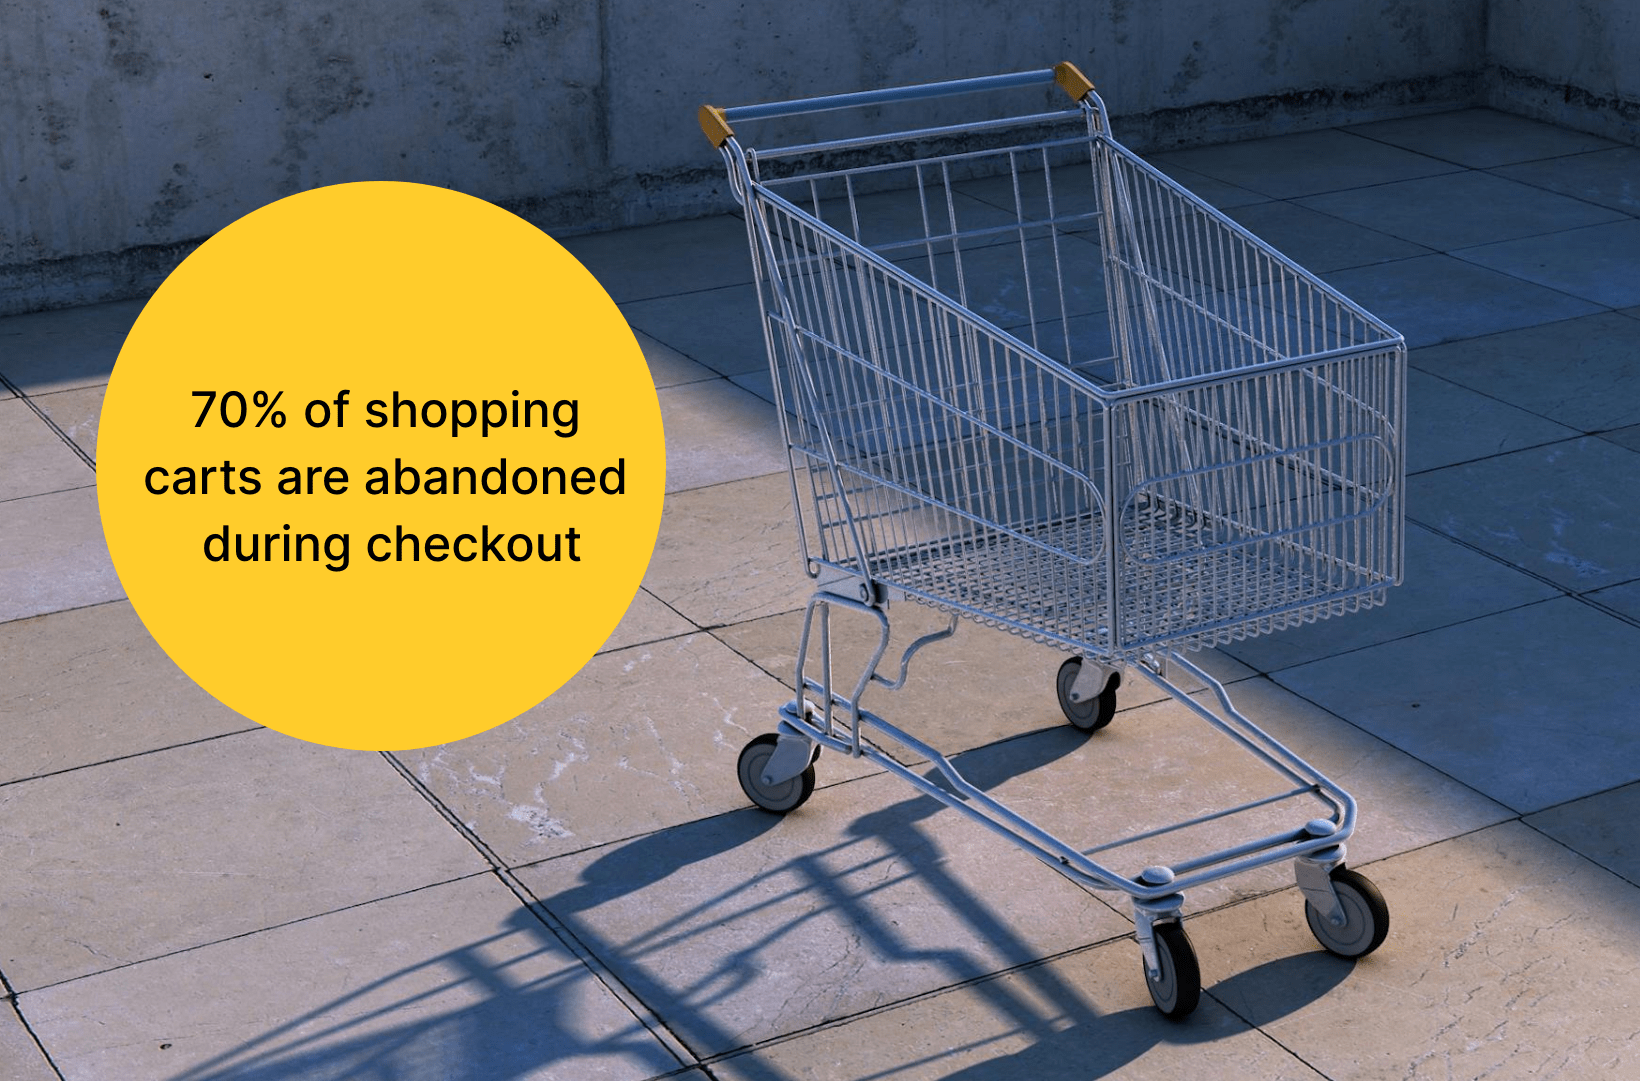
According to recent research by Baymard Institute, 70.19% of shopping carts are abandoned during checkout. This statistic represents more than just missed opportunities; it clearly indicates that optimizing the checkout process should be a top priority for eCommerce businesses.
A smooth and efficient checkout experience is necessary in converting browsing into sales. When customers face hurdles or inefficiencies during the final steps of their purchase, the likelihood of abandonment increases significantly. Here’s where WooCommerce, a flexible eCommerce solution for WordPress websites, comes into play. The true strength of WooCommerce lies in its flexibility and ability to customize the checkout process entirely.
There are numerous plugins and extensions available for WooCommerce that allow for further customization. For instance, there are specific plugins designed to enhance or completely overhaul the checkout process. Additionally, WooCommerce is open-source, which means developers can access and modify the source code. This makes it easy to implement custom functionalities and design elements that fit your exact specifications.
Customizing the checkout process in WooCommerce is more than just tweaking aesthetics – it’s about creating a streamlined, user-friendly shopping journey that leads to better outcomes for both customers and store owners. It can:
- Increase conversion rates: A tailored checkout experience reduces cart abandonment by smoothing out friction points, offering multiple payment options, and making the process as quick as possible.
- Boost user experience: By speeding up checkout times, optimizing for mobile users, and providing options like guest checkout, you can significantly enhance customer satisfaction.
- Enhance brand consistency: Customization allows your brand to shine through at every step of the purchase process with custom fields and cohesive design elements that reflect your brand’s identity.
- Improve data collection: Utilize custom fields to gather essential insights about your customers’ preferences and shopping habits, which can inform future marketing and sales strategies.
- Augment operational efficiency: Automate tasks such as tax calculations and shipping updates through a custom checkout, thereby saving time, reducing errors, and improving your team’s efficiency.
In this article, we’ll explore various ways to customize the WooCommerce checkout form. We’ll also discuss why engaging an expert WooCommerce agency like Saucal can simplify this process and ensure that your eCommerce platform is optimized for success from the get-go.
Common ways of customizing the checkout form in WooCommerce
WooCommerce offers flexible options to tailor this crucial stage to better meet the needs of your business and your customers. Let’s explore some effective strategies for customizing your WooCommerce checkout form:
Editing the design
The visual appeal of your WooCommerce checkout page plays a critical role in maintaining customer interest and trust. A design that reflects your brand identity not only looks professional but also reassures customers that they are in a secure and reliable environment. Simple changes, such as using your brand’s color scheme and typography, can create a smooth shopping experience that reduces cognitive dissonance and promotes conversions.
Changing the text on the “Place Order” button
The Call-to-Action (CTA) button is one of the last things your customers interact with before making a purchase. Tweaking the text on your “Place Order” button can significantly influence buyer behavior. Testing variations like “Complete Your Purchase” or “Buy Now” can lead to different customer reactions. A/B testing these small changes can reveal what works best for your audience, potentially boosting your conversion rates.
Adding new fields or reordering fields
Customizing the fields in your checkout form can be highly beneficial. For instance, rearranging the order to place the email field first allows you to capture contact details early, which is crucial for follow-up in cases of abandoned carts.
Additionally, adding fields for marketing preferences or gift messages can enhance your data collection without complicating the checkout process. But make sure these fields are optional to avoid making the checkout process harder and avoid overwhelming customers. Focus on the most valuable insights you need. For example:
- Use conditional logic to display optional fields only when relevant. For instance, you can show the gift message field only if the customer selects a gift option.
- Position the optional fields in a less intrusive area of the checkout form, such as at the end or in a separate section labeled “Additional Information”.
This way, you gather useful customer information without causing any inconvenience.
Removing unnecessary fields and distractions
Simplifying the checkout process is key to reducing cart abandonment. Eliminate any fields that are not absolutely necessary, as each additional step can lead to potential drop-offs. It’s also vital to remove distractions like pop-ups for newsletter signups during checkout, as they can detract from the customer’s focus on completing their purchase.
Adding verifications on steps
Incorporating verification mechanisms can help reduce errors, prevent fraud, and ensure the accuracy of the data collected. Simple checks like verifying a correct email address or payment details can save a lot of hassle later by decreasing the likelihood of chargebacks and ensuring smooth delivery of services or products.
Setting preferred contact methods
Giving customers the option to choose their preferred method of contact, whether it’s email, phone, or text, can significantly enhance their shopping experience. This customization caters to individual preferences and increases the likelihood of customer satisfaction and retention.
Adding customer reviews and ratings
Incorporating a section for customer reviews and ratings on the checkout page provides valuable social proof, increasing the confidence of new buyers. Seeing positive feedback from other customers can reassure hesitant shoppers and can be a powerful influence in the decision-making process.
Adding related products, cross-sells, and up-sells
Strategically placing related products, cross-sells, and up-sells during the checkout process can significantly increase the average order value. By suggesting additional, relevant items before the final purchase, you not only improve the customer experience by offering more choices but also increase your revenue potential.
Customizing your checkout form with a checkout field plugin
Checkout field plugins for WooCommerce provide a cost-effective and flexible solution for customizing your online store’s checkout process. These plugins enable you to easily modify your checkout fields by adding, deleting, and rearranging them to suit your business needs. For many store owners, this level of customization is sufficient for enhancing user experience and streamlining the checkout process.
Let’s explore some WordPress checkout field plugins:
Funnel Builder by FunnelKit

Funnel Builder by FunnelKit goes beyond simple field editing to allow the creation of custom sales funnels within WooCommerce. This plugin can drastically enhance marketing capabilities by guiding customers through tailored purchase paths. It offers a variety of templates for opt-in pages, landing pages, and checkout pages designed to convert visitors into leads and customers.
FunnelKit is flexible and has vast integration capabilities. However, it can be complex and potentially overkill for businesses only needing basic checkout field customization.
Checkout Field Editor (Checkout Manager) for WooCommerce
Checkout Field Editor (Checkout Manager) for WooCommerce enables users to add up to 20 different types of fields to the WooCommerce checkout page, including text, number, hidden, password, email, phone, radio buttons, text areas, select menus, multi-select menus, checkboxes, date and time pickers, and more. It allows users to easily manage the display of fields based on user input and other conditions.
The premium version supports more types of fields, including file uploads, and allows for more advanced configurations like custom validations, conditional logic for displaying fields, and pricing options linked to custom fields.
WooCommerce Checkout Field Editor

WooCommerce Checkout Field Editor provides a straightforward interface for adding, editing, and removing fields in the checkout process. This plugin supports various field types, including text, checkboxes, and date pickers. Pros include its ease of use and the ability to handle most standard customizations without any coding.
WooCommerce One Page Checkout

WooCommerce One Page Checkout simplifies the checkout process by combining all steps on a single page. Both the product selection and checkout forms are displayed on the same page, enabling customers to add or remove items and complete their payment without navigating to different pages. Product pages can easily be converted to checkout pages with a simple checkbox.
This plugin can increase conversion rates by reducing the steps needed to complete a purchase. Its pros include improved user experience and decreased cart abandonment.
Custom Checkout Fields for WooCommerce
Custom Checkout Fields for WooCommerce lets you tailor the checkout experience by adding custom fields specifically designed to gather unique customer data. Pros include the ability to capture a wide variety of information and easy integration with standard WooCommerce functionality. However, there aren’t many reviews on this plugin (let alone negative ones).
Customizing your checkout form with the WooCommerce Checkout Block
WooCommerce provides a powerful feature known as the Checkout Block, which is part of the native Gutenberg editor integration. It specifically enables site owners to design and edit the checkout experience directly from the editor, providing a more visual and intuitive way to handle how customers finalize their purchases by:
- Editing text and fields: You can modify the labels, placeholders, and other text within the checkout form. You can also add or remove fields according to the specific information you need to collect from your customers.
- Modifying the design: It’ll enable you to adjust the layout, colors, and styles to match your website’s theme and enhance the user experience.
- Adding new elements: You can incorporate other blocks, such as images, text boxes, or promotional banners, to create a more engaging and informative checkout process.
Using and customizing the WooCommerce Checkout Block involves a few steps, primarily centered around using the WordPress Block Editor. If your site uses block themes, the Checkout page will likely already use the Checkout Block. You can adjust the settings directly within the block editor. Here’s a guide to help you get started:
Step 1: Make sure you have the latest version of WooCommerce installed on your WordPress site.
Step 2: Create a new page or edit an existing one where you want the checkout process to appear and open the Block Editor.
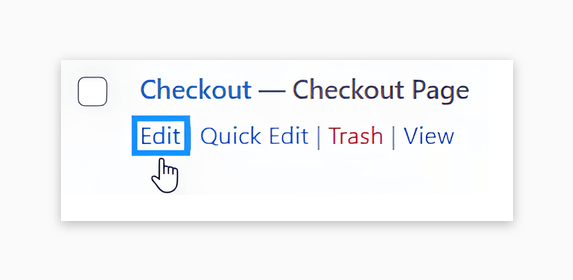
Step 3: If you’re editing an existing checkout page, make sure to delete the old checkout shortcode before adding the new Checkout Block.
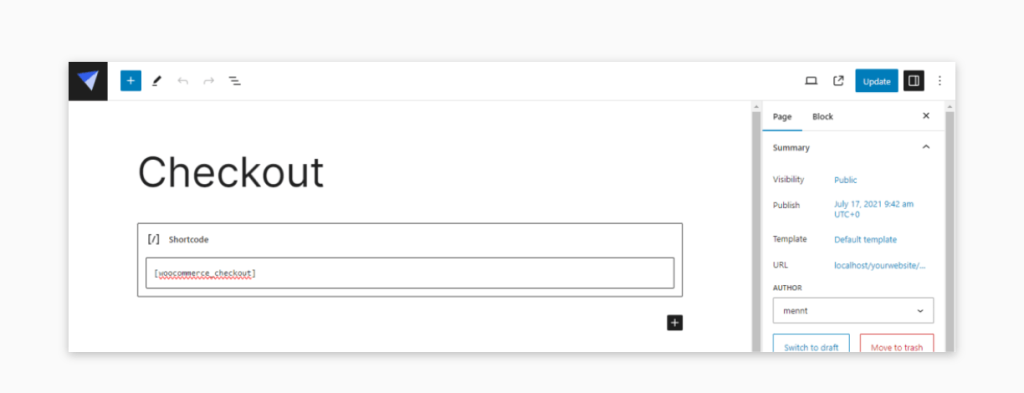

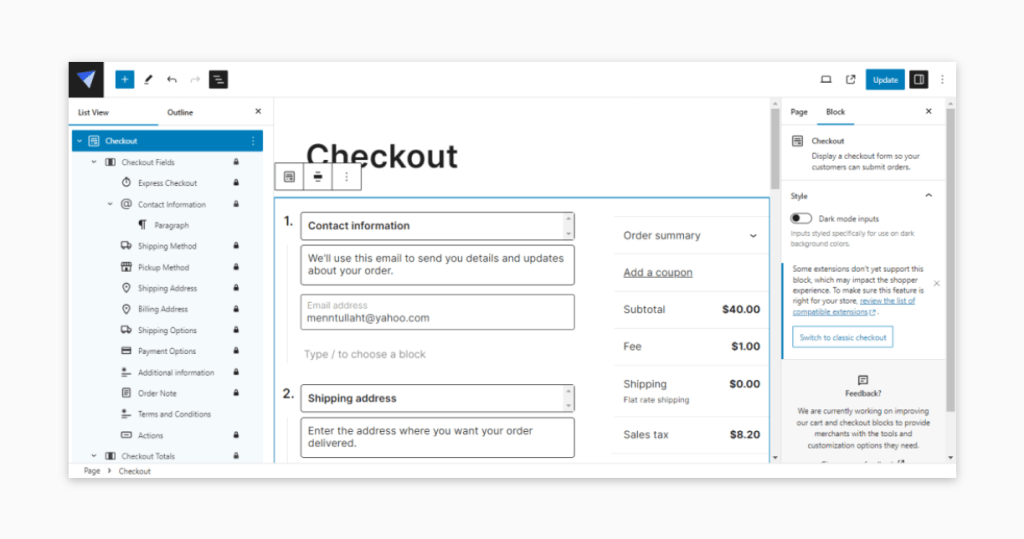
Step 4: Click on the + icon, search for Checkout in the block search bar, and select the Checkout Block to add it to your page.

Step 5: Once you have added the checkout block, you can start customizing it. You can typically customize aspects like colors, column layout, and whether to show or hide certain elements like coupon fields, policy links, or notes.
Step 6: If you’ve created a new page, you’ll need to configure it to be the default checkout page via WooCommerce settings.
Step 7: Before going live, thoroughly test the checkout process to ensure everything works seamlessly. Check responsiveness on different devices, test payment methods, and ensure that all necessary information is collected and processed correctly.
Step 8: Once you are satisfied with the setup and testing, publish or update the page. Ensure that this page is properly linked from your cart page or any other relevant part of your site.
Step 9: Make sure to monitor this new checkout page’s performance and customer feedback. Optimization may include adjusting the layout, simplifying the process, or adding custom hooks for advanced functionalities.
⚠️ Despite the fact that the WooCommerce Checkout Block can dramatically improve the checkout experience for your customers, it is incompatible with some plugins. It’s essential to test thoroughly any extensions you plan to use with this block.
You might need to delve into some code for more advanced customizations. WooCommerce provides hooks and filters that developers can use to modify checkout behaviors, add custom fields, or integrate with other plugins. For example, woocommerce_checkout_fields can be used to modify the array of checkout fields.
Customizing your checkout form with custom coding
While plugins and blocks offer convenient ways to customize WooCommerce checkout pages, there are situations where they may not suffice. Custom coding presents a powerful alternative because of the following benefits:
- Full control and customization: This method enables you to implement specific features tailored to your business needs that plugins or blocks might not support. Whether it’s a unique field interaction or a custom user flow, coding from scratch means your vision isn’t limited by the functionalities of third-party tools.
- Performance optimization: Custom code can often be more lightweight than plugin-based solutions, which might be bloated with unnecessary features that slow down your site. By adding custom code that does only what you need it to, you ensure that only the essential functionalities are added, thus enhancing the page load times and overall smoothness of the user experience.
- Long-term scalability: Unlike plugins, which you might outgrow or that might not be regularly updated, custom-coded features can be adjusted and scaled as needed, providing long-term flexibility without being tied to the constraints of third-party developments.
- Integration with external systems: Custom coding allows for deeper integration with CRM systems, marketing tools, or other third-party APIs. This is crucial for businesses that rely on sophisticated backend systems to track customer behavior, manage leads, or automate marketing and sales activities.
Examples of using code to customize the checkout form
Adding custom fields
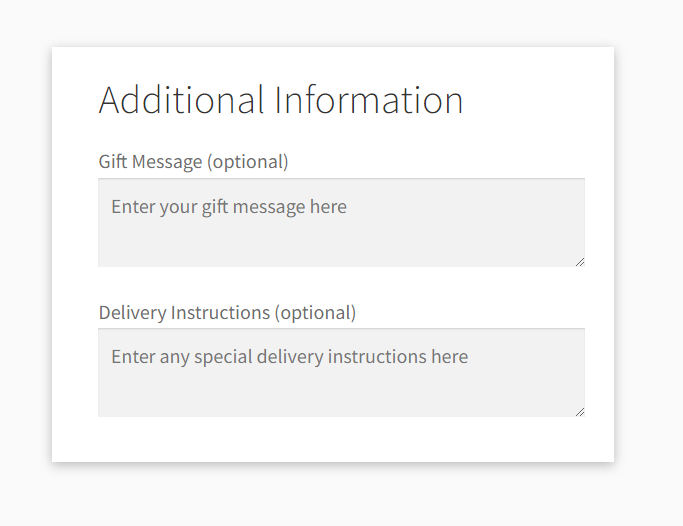
For example, adding custom input fields for additional customer information, such as gift messages or delivery instructions, can be done by inserting specific code snippets into your WooCommerce child theme’s functions.php file or through a custom plugin.
Here’s a sample code to get you started:
// Add custom fields to the checkout page
add_action( 'woocommerce_after_order_notes', 'saucal_custom_checkout_fields' );

function saucal_custom_checkout_fields( $checkout ) {
	echo '<div id="saucal_custom_checkout_fields"><h2>' . esc_html__( 'Additional Information', 'saucal-custom-code' ) . '</h2>';

	// Gift message field
	woocommerce_form_field(
		'gift_message',
		array(
			'type'        => 'textarea',
			'class'       => array( 'gift-message form-row-wide' ),
			'label'       => esc_html__( 'Gift Message', 'saucal-custom-code' ),
			'placeholder' => esc_html__( 'Enter your gift message here', 'saucal-custom-code' ),
		),
		$checkout->get_value( 'gift_message' )
	);

	// Delivery instructions field
	woocommerce_form_field(
		'delivery_instructions',
		array(
			'type'        => 'textarea',
			'class'       => array( 'delivery-instructions form-row-wide' ),
			'label'       => esc_html__( 'Delivery Instructions', 'saucal-custom-code' ),
			'placeholder' => esc_html__( 'Enter any special delivery instructions here', 'saucal-custom-code' ),
		),
		$checkout->get_value( 'delivery_instructions' )
	);

	echo '</div>';
}

// Save the custom fields
add_action( 'woocommerce_checkout_update_order_meta', 'save_saucal_custom_checkout_fields' );

function save_saucal_custom_checkout_fields( $order_id ) {
	if ( ! empty( $_POST['gift_message'] ) ) {
		update_post_meta( $order_id, '_gift_message', sanitize_text_field( $_POST['gift_message'] ) );
	}
	if ( ! empty( $_POST['delivery_instructions'] ) ) {
		update_post_meta( $order_id, '_delivery_instructions', sanitize_text_field( $_POST['delivery_instructions'] ) );
	}
}

// Display custom fields in order admin
add_action( 'woocommerce_admin_order_data_after_billing_address', 'display_saucal_custom_checkout_fields_admin', 10, 1 );

function display_saucal_custom_checkout_fields_admin( $order ) {
	$gift_message          = get_post_meta( $order->get_id(), '_gift_message', true );
	$delivery_instructions = get_post_meta( $order->get_id(), '_delivery_instructions', true );

	if ( $gift_message ) {
		echo '<p><strong>' . esc_html__( 'Gift Message', 'saucal-custom-code' ) . ':</strong> ' . esc_html( $gift_message ) . '</p>';
	}

	if ( $delivery_instructions ) {
		echo '<p><strong>' . esc_html__( 'Delivery Instructions', 'saucal-custom-code' ) . ':</strong> ' . esc_html( $delivery_instructions ) . '</p>';
	}
}

// Add custom fields to order emails
add_filter( 'woocommerce_email_order_meta_fields', 'email_saucal_custom_checkout_fields', 10, 3 );

function email_saucal_custom_checkout_fields( $fields, $sent_to_admin, $order ) {
	$gift_message          = get_post_meta( $order->get_id(), '_gift_message', true );
	$delivery_instructions = get_post_meta( $order->get_id(), '_delivery_instructions', true );

	if ( $gift_message ) {
		$fields['gift_message'] = array(
			'label' => esc_html__( 'Gift Message', 'saucal-custom-code' ),
			'value' => $gift_message,
		);
	}

	if ( $delivery_instructions ) {
		$fields['delivery_instructions'] = array(
			'label' => esc_html__( 'Delivery Instructions', 'saucal-custom-code' ),
			'value' => $delivery_instructions,
		);
	}

	return $fields;
}
Here’s the code breakdown for you. Note that we’ve prefixed parts of the code – i.e. we turned “custom_checkout_fields” to “saucal_custom_checkout_fields”. We’ve done this to avoid the possibility of colliding with another plugin, which would cause a site crash.
woocommerce_after_order_notesaction hook adds custom fields to the checkout page.woocommerce_checkout_update_order_metaaction hook saves the custom field data to the order meta.woocommerce_admin_order_data_after_billing_addressaction hook displays the custom field data in the order admin area.woocommerce_email_order_meta_fieldsfilter adds the custom fields to order emails.
Modifying existing fields
You can easily change default field properties – such as labels, placeholders, and required statuses – to better fit your business model. This includes altering the text displayed or making a field optional based on what makes sense for your customer base.
To modify existing fields in WooCommerce, you can use hooks to change the properties of checkout fields. Here’s an example of how to do this in your child theme’s functions.php file:
add_filter( 'woocommerce_checkout_fields', 'saucal_custom_override_checkout_fields' );

function saucal_custom_override_checkout_fields( $fields ) {
    // Change the placeholder text for the billing first name
    $fields['billing']['billing_first_name']['placeholder'] = 'Your first name';

    // Change the label for the billing last name
    $fields['billing']['billing_last_name']['label'] = 'Surname';

    // Make the billing phone number field optional
    $fields['billing']['billing_phone']['required'] = false;

    // Change the placeholder text for the billing email
    $fields['billing']['billing_email']['placeholder'] = 'yourname@example.com';

    // Add a custom class to the billing address 1 field
    $fields['billing']['billing_address_1']['class'][] = 'my-custom-class';

    // Remove the billing company field
    unset( $fields['billing']['billing_company'] );

    return $fields;
}
Dynamic field display
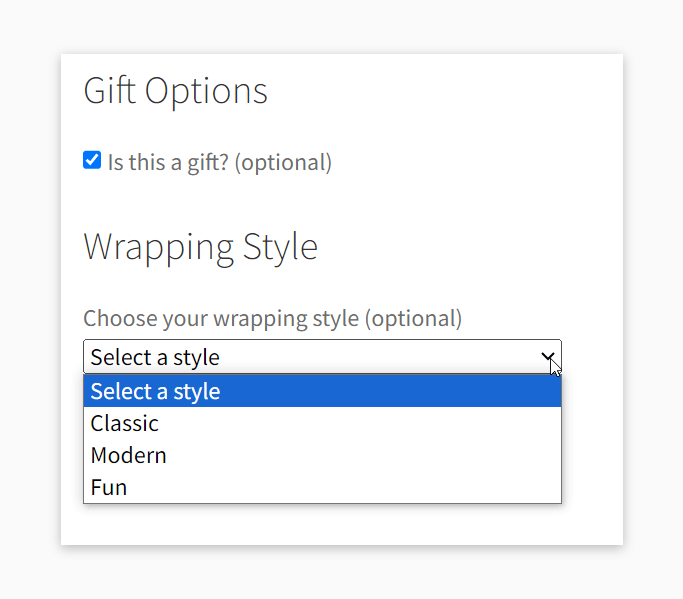
Using conditional logic to display or hide fields based on user selection can create a more dynamic and user-friendly checkout experience. This is particularly useful for offering additional purchase options or collecting relevant information without overwhelming the customer.
Here’s a step-by-step guide to add a conditional custom field in WooCommerce for choosing a wrapping style if the customer selects that the order is a gift, for example:
function saucal_custom_gift_wrap_checkbox() {
	echo '<div id="gift_wrap_checkbox"><h3>' . esc_html__( 'Gift Options', 'saucal-custom-code' ) . '</h3>';

	woocommerce_form_field(
		'saucal_is_gift',
		array(
			'type'  => 'checkbox',
			'class' => array( 'gift-wrap-checkbox form-row-wide' ),
			'label' => esc_html__( 'Is this a gift?', 'saucal-custom-code' ),
		),
		WC()->checkout->get_value( 'saucal_is_gift' )
	);

	echo '</div>';
}
add_action( 'woocommerce_after_order_notes', 'saucal_custom_gift_wrap_checkbox' );

function saucal_custom_wrapping_style_field() {
	echo '<div id="wrapping_style_field" style="display:none;"><h3>' . esc_html__( 'Wrapping Style', 'saucal-custom-code' ) . '</h3>';

	woocommerce_form_field(
		'saucal_wrapping_style',
		array(
			'type'    => 'select',
			'class'   => array( 'wrapping-style-field form-row-wide' ),
			'label'   => esc_html__( 'Choose your wrapping style', 'saucal-custom-code' ),
			'options' => array(
				''        => esc_html__( 'Select a style', 'saucal-custom-code' ),
				'classic' => esc_html__( 'Classic', 'saucal-custom-code' ),
				'modern'  => esc_html__( 'Modern', 'saucal-custom-code' ),
				'fun'     => esc_html__( 'Fun', 'saucal-custom-code' ),
			),
		),
		WC()->checkout->get_value( 'saucal_wrapping_style' )
	);

	echo '</div>';
}
add_action( 'woocommerce_after_order_notes', 'saucal_custom_wrapping_style_field' );


function saucal_save_gift_wrap_order_meta( $order_id ) {
	// phpcs:disable WordPress.Security.NonceVerification.Missing
	if ( ! empty( $_POST['saucal_is_gift'] ) ) {
		update_post_meta( $order_id, '_saucal_is_gift', sanitize_text_field( $_POST['saucal_is_gift'] ) );
	}
	if ( ! empty( $_POST['saucal_wrapping_style'] ) ) {
		update_post_meta( $order_id, '_saucal_wrapping_style', sanitize_text_field( $_POST['saucal_wrapping_style'] ) );
	}
	// phpcs:enable WordPress.Security.NonceVerification.Missing
}
add_action( 'woocommerce_checkout_update_order_meta', 'saucal_save_gift_wrap_order_meta' );

function saucal_display_gift_wrap_in_admin_order( $order ) {
	$is_gift        = get_post_meta( $order->get_id(), '_saucal_is_gift', true );
	$wrapping_style = get_post_meta( $order->get_id(), '_saucal_wrapping_style', true );

	if ( $is_gift ) {
		echo '<p><strong>' . esc_html__( 'Gift Wrap:', 'saucal-custom-code' ) . '</strong> Yes</p>';
		if ( $wrapping_style ) {
			echo '<p><strong>' . esc_html__( 'Wrapping Style:', 'saucal-custom-code' ) . '</strong> ' . esc_html( ucfirst( $wrapping_style ) ) . '</p>';
		}
	}
}
add_action( 'woocommerce_admin_order_data_after_billing_address', 'saucal_display_gift_wrap_in_admin_order', 10, 1 );

function saucal_custom_checkout_field_script() {
	if ( ! is_checkout() ) {
		return;
	}
	?>
	<script type="text/javascript">
	jQuery(function($){
		$('#saucal_is_gift').change(function(){
			if ($(this).is(':checked')) {
				$('#wrapping_style_field').show();
			} else {
				$('#wrapping_style_field').hide();
			}
		}).change(); // Trigger the change event to show/hide on load
	});
	</script>
	<?php
}
add_action( 'wp_footer', 'saucal_custom_checkout_field_script' );
Code breakdown:
- The
saucal_custom_gift_wrap_checkbox()function creates a checkbox labeled Is this a gift? and outputs it after the order notes section on the checkout page. - The
woocommerce_form_fieldWooCommerce function generates the HTML for the checkbox. WC()->checkout->get_value('saucal_is_gift')retrieves any previously entered value for thesaucal_is_giftfield, ensuring the checkbox state is retained if the page is reloaded- The
saucal_custom_wrapping_style_field()function creates a dropdown menu for selecting a wrapping style. It starts off hidden (style="display:none;"). - The
saucal_save_gift_wrap_order_meta($order_id)function saves the'saucal_is_gift'and'saucal_wrapping_style'values to the order meta data. - update_post_meta: Stores the data in the order meta with keys ‘
_saucal_is_gift‘ and__saucal_wrapping_style'. sanitize_text_fieldensures the data is sanitized before saving it to the database.- The
saucal_custom_checkout_field_script()function adds custom JavaScript to the checkout page. - The JavaScript/jQuery code adds an event listener to the
'saucal_is_gift'checkbox that shows the'wrapping_style_field'dropdown when the checkbox is checked and hides it when unchecked. if ($(this).is(':checked'))checks if the checkbox is selected..change()triggers the change event when the page loads to ensure the wrapping style field is shown/hidden based on the current state of the checkbox.
Custom validation
Implement custom validation rules to ensure the data collected meets specific business requirements. This can include complex validations that ensure phone numbers or tax IDs are valid for specific regions or customer types.
Checkout layout changes
Rearrange the checkout page layout to streamline the process or better align it with your brand aesthetics. This might involve moving certain fields around or changing the visual styling to guide users more effectively through the buying process.
⚠️ Customizing the WooCommerce checkout entails a deep understanding of the platform’s architecture and coding practices.
Without a comprehensive knowledge of WooCommerce, implementing custom solutions can pose serious risks, such as broken functionality, security vulnerabilities, or conflicts with other parts of your website. It’s essential to ensure that any code modifications are performed by someone with the requisite expertise.
Kostas Seresiotis, Senior Product Engineer at Saucal
Your best choice: Build a custom checkout form with Saucal
Having explored the various ways to customize your WooCommerce checkout – ranging from plugins and blocks to direct code manipulation – it’s clear that each method has its advantages. However, when it comes to implementing custom code solutions, the complexity and need for precision can make it an overwhelming task.
This is where our WooExperts at Saucal (the leading Woocommerce development agency) come to the rescue. Our deep knowledge of WooCommerce provides a wealth of experience in anticipating and resolving potential issues before they arise.
Customization is at the heart of our offerings. We excel in tailoring checkout forms that align with your brand’s identity and enhance the overall user experience. Whether it’s adjusting the checkout form flow to reduce friction points or adding custom fields that capture essential customer information, we can craft a checkout process that fits your unique business needs.
We’re also proficient in integrating custom checkouts smoothly with existing systems and third-party services. If you need to connect your eCommerce platform with CRM software, marketing tools, or any other external systems, we’ll make it happen while enhancing your operational efficiency and data coherence.
At Saucal, the focus is always on the end-user experience. We prioritize mobile responsiveness and ease of use to ensure that the checkout process is as intuitive and accessible as possible. This approach improves user satisfaction and drives higher conversion rates by minimizing abandonment at the checkout stage.
While in-house teams can tackle this project, partnering with us at Saucal brings a level of expertise and efficiency that accelerates the development process, reduces the likelihood of errors, and ensures efficient integration.